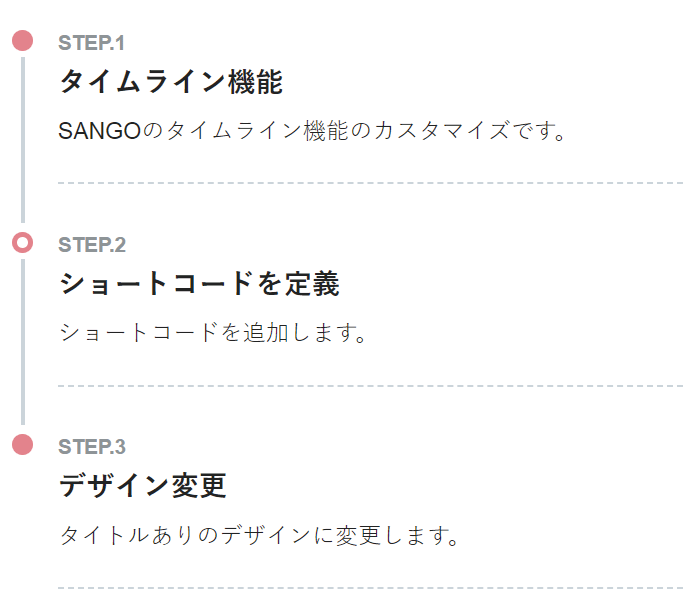
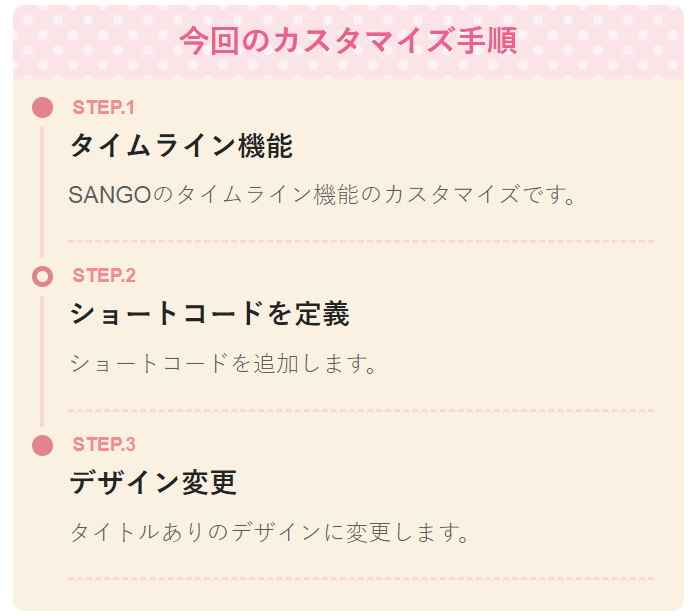
今回は、SANGOのタイムラインの新しいショートコードを追加してデザインを変更するカスタマイズです!
デフォルトのタイムライン機能もシンプルで使いやすのですが、タイトルがあるとより分かりやすいかな?と思い、タイトルを付けるカスタマイズを行いました!
デフォルトのタイムライン機能は、タイトルを付けるところがなかったので、今回のカスタマイズで新しくショートコードを追加してタイトルをつけられるようにしました。
まぁ、タイムラインをボックスの中に入れれば、タイトルをつけられますが、タイムライン用にデザインを変えたかったので個別で新しく設定しています。
 みっぴー
みっぴー


みっぴー(@bennriya_mi)です~。
アイキャッチを変えただけで、広告表示回数が5倍になりました。(こっそり独り言)
今回、そのアイキャッチを誰でも使えるようにテンプレにしました。
詳しくは、下記にて
今回のタイムラインのカスタマイズ内容
 みっぴー
みっぴー
今回のタイムラインのカスタマイズ内容をまとめると下記の通りです。
- 追加のショートコードを定義
- オリジナルのタイムラインをショートコードで呼び出せる
- 好きなデザインに指定出来る
- タイムラインのタイトルを追加できる
修正するファイル
今回のカスタマイズで編集するファイルは下記の通りです。
- functions.php
- style.css
functions.phpのファイルを編集する場合は、必ずバックアップを取った上で編集してください。functions.phpの記入を誤るとブログの画面が真っ白になって管理画面にさえも入れなくなります。編集は慎重に行ってください。万が一、真っ白になった場合は「[WordPress]functions.phpを編集後に画面が真っ白になった時の対処法と注意点」を参考にしてください。
 [WordPress]functions.phpを編集後に画面が真っ白になった時の対処法と注意点
タイムライン機能のデザイン変更とショートコード追加方法
今回のタイムライン機能のデザイン変更とショートコード追加の手順は下記の通りです。
 みっぴー
みっぴー
- STEP.1ショートコードを定義「
functions.php」にこれから紹介するコードを追記して新しいショートコードを定義します。 - STEP.2CSSを定義「
style.css」に新しいCSSを追加してタイムラインのスタイルを変更します。 - STEP.3記事内にショートコードで呼び出しショートコードで記事内に呼び出す。
1.ショートコードを定義
まずは、functions.phpにタイムラインの新たなショートコードを定義していきます。
このショートコードを追記することで、タイムラインのタイトルを設定することが出来るようになります。
下記のコードを追記してください。
/*********************
タイトルありタイムライン
 *********************/
add_shortcode('timeline1', 'sng_insert_1timeline');
add_shortcode('name1', 'sng_insert_name1_parts');
add_shortcode('tl1', 'sng_insert_tl1_parts');

function sng_insert_1timeline($atts, $content = null)
{
    if ($content) {
        $content = do_shortcode(shortcode_unautop($content));
        $output = '<ul class="tl1">' . $content . '</ul>';
        return $output;
    }
}
function sng_insert_name1_parts($atts, $content = null)
{
    $title = isset($atts['title']) ? '' . $atts['title'] . '' : null;
    return '<div class="tl1_name">' . $title . '</div>';
}
function sng_insert_tl1_parts($atts, $content = null)
{
    $label = isset($atts['label']) ? '<div class="tl1_label">' . $atts['label'] . '</div>' : null;
    $title = isset($atts['title']) ? '<div class="tl1_title">' . $atts['title'] . '</div>' : null;
    if ($content) {
        $content = do_shortcode(shortcode_unautop($content));
        $content = '<div class="tl1_content">' . $content . '</div>';
    }
    $marker = '<div class="tl1_marker main-bdr main-bc"></div>';
    return '<li class="main-bdr">' . $label . $title . $content . $marker . '</li>';
}
2.CSSを定義
次にstyle.cssに下記のCSSを追記してください。
/*タイムライン*/
.entry-content .tl1 {
  border-radius: 8px;
  border: none;
  background-color: #fcf3e3;
  margin: 3.5em 0 1em 0;
  padding: 5px 20px 0.6em 13px;
  list-style: none;
}
.tl1 li {
  position: relative;
  padding: 0 0 0.6em 1.4em;
}
.tl1 > li:before {
  content: "";
  width: 3px;
  background: #ffdbdb;
  display: block;
  position: absolute;
  top: 25px;
  bottom: 0;
  left: 5px;
}
.tl1_marker {
  content: "";
  display: inline-block;
  position: absolute;
  top: 5px;
  left: 0;
  width: 14px;
  height: 14px;
  border-radius: 50%;
  border: solid 3px;
}
.tl1 li:not(:first-of-type):not(:last-of-type) .tl1_marker {
  background: transparent;
}
.tl1 li:last-of-type:before {
  content: none;
}
.tl1_name {
  position: relative;
  border-radius: 8px 8px 0 0;
  background-color: #ffe6ea;
  background-image: radial-gradient(#fff4f9 24%, transparent 0), radial-gradient(#fff4f9 24%, transparent 0);
  background-position: 0 0, 10px 10px;
  background-size: 20px 20px;
  color: #ff6699;
  font-size: 1.2em;
  font-weight: bold;
  text-align: center;
  padding: 6px;
  margin: -5px -20px 7px -13px;
}
.tl1_label {
  padding: 0 3px 0 3px;
  color: #ff9393;
  font-size: 0.75em;
  font-weight: bold;
  border-radius: 5px;
}
.tl1_title {
  font-size: 1.1em;
  font-weight: bold;
  line-height: 1.5;
}
.tl1_content {
  font-size: 0.9em;
  line-height: 1.5;
  margin-top: 0.5em;
  padding: 0 0 1.2em;
  border-bottom: dashed 2px #ffdbdb;
  color: #5f5f5f;
}
.entry-content .tl1_content > * {
  margin: 0.7em 0 0;
}
.entry-content .tl1_content .sng-box {
  margin-top: 1em;
}タイムラインの最初の大見出し、つまりタイトルの部分のclassは「.tl1_name」で指定しているので色など変えたい場合はその部分を編集してください。
下記のショートコードのこの部分です。
[name1 title='タイトル'][/name1]全体の背景の色などは「.entry-content .tl1」の部分を編集して変更してください。
3.記事内にショートコードで呼び出し
デフォルトのショートコードは下記の通りです。
[timeline]
[tl label='STEP.1' title='STEP.1の内容']STEP.1の詳細説明[/tl]
[tl label='STEP.2' title='STEP.2の内容']STEP.2の詳細説明[/tl]
[tl label='STEP.3' title='STEP.3の内容']STEP.3の詳細説明[/tl]
[tl label='STEP.4' title='STEP.4の内容']STEP.4の詳細説明[/tl]
[tl label='STEP.5' title='STEP.5の内容']STEP.5の詳細説明[/tl]
[/timeline]
みっぴー
みっぴー
最後に記事内にショートコードを記載して、今回作ったタイムラインを呼び出します。
下記のように記載するとタイムラインを呼び出すことができます。
[timeline1]
[name1 title='タイトル'][/name1]
[tl1 label='STEP.1' title='STEP.1の内容']STEP.1の詳細説明[/tl1]
[tl1 label='STEP.2' title='STEP.2の内容']STEP.2の詳細説明[/tl1]
[tl1 label='STEP.3' title='STEP.3の内容']STEP.3の詳細説明[/tl1]
[tl1 label='STEP.4' title='STEP.4の内容']STEP.4の詳細説明[/tl1]
[tl1 label='STEP.5' title='STEP.5の内容']STEP.5の詳細説明[/tl1]
[/timeline1][name1 title='タイトル'][/name1]この部分が、今回追加した部分です。
タイムラインの大見出しの役割なのでそのタイムラインのタイトルなどを入れてくださいね。
 みっぴー
みっぴー


